Choosing a sterile cover for surgical imaging equipment is a practical decision, not a simple purchasing task. The right cover protects patients, staff, and expensive equipment from contamination during demanding procedures. It must also preserve visibility, movement, and access to essential controls. Small design details can matter greatly.
This guide explains how to choose a sterile cover for a C-arm or microscope by examining fit, material, optical clarity, and secure fastening. A C-arm cover should accommodate arm movement without pulling loose or blocking image access. A microscope drape needs clear optical areas, smooth lens protection, and openings that support comfortable handling. Covers should fit the exact equipment model. Generic sizing can create unexpected folds.
In operating rooms, I have seen poorly positioned drapes interfere with handles, cables, or adjustment knobs. That experience makes verification important. Check the manufacturer’s instructions, packaging information, and your facility’s infection-control requirements. Confirm sterility, expiration dates, packaging integrity, and compatibility with the equipment before use. Latex-free materials may be preferable for sensitive environments, but the clinical team should verify material information.
No cover is perfect.
A reliable selection process includes input from surgeons, nurses, technicians, and purchasing staff. Their daily experience can reveal problems that product descriptions miss. Consider procedure length, fluid exposure, lighting, storage conditions, and disposal requirements. When possible, test a sample before routine adoption. A cover that appears suitable on paper may still restrict movement or reduce visibility during a real procedure. Careful evaluation supports safer, more efficient, and more consistent surgical workflows.
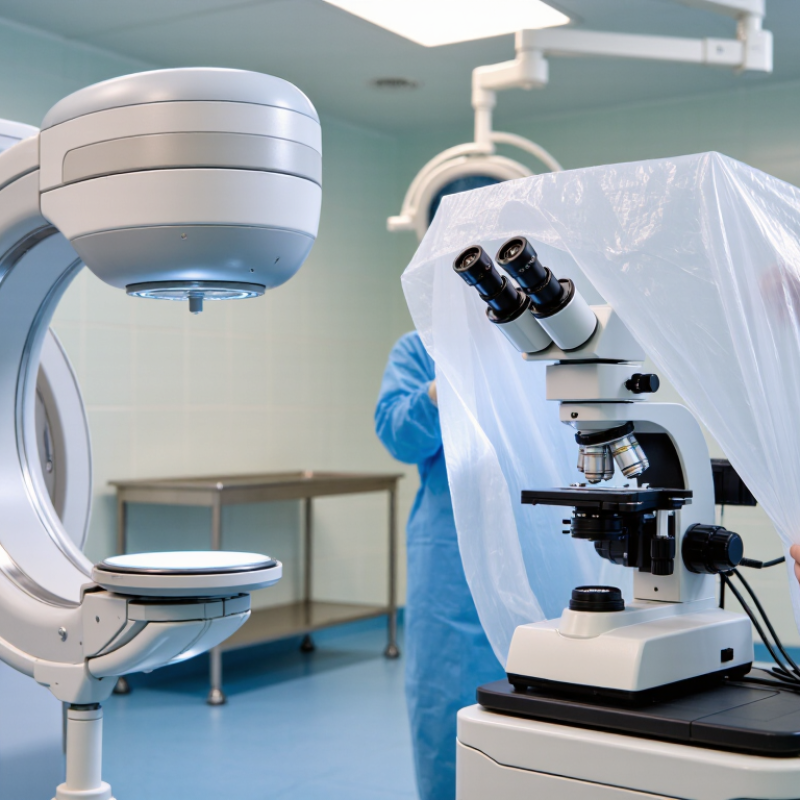
Identify the procedure before selecting a sterile cover. A mobile C arm needs flexible coverage for the image intensifier, detector, and exposed cables. A surgical microscope needs a clear optical window, secure lens protection, and enough length for arm movement. Orthopedic imaging may require repeated repositioning, while neurosurgery demands stable, low-glare viewing. The cover must fit the equipment without blocking controls, vents, or image quality.
CDC data reports that about one in 31 hospital patients has a healthcare-associated infection on any given day. Barrier selection supports infection prevention, but it cannot replace validated cleaning and sterile technique.
Review the equipment instructions for use, procedure duration, and sterile-field boundaries. Check whether the cover resists tearing during draping and remains secure near moving joints. AORN guidance emphasizes maintaining sterility during equipment introduction and manipulation. WHO’s 2022 global IPC report estimates healthcare-associated infections affect 7 in 100 acute-care patients in high-income countries. That figure deserves attention. Yet, fit is sometimes treated as an afterthought. It should not be. A loose cover can fold into the beam path or touch nonsterile surfaces.
Tips: Measure the equipment before ordering. Confirm lens and detector dimensions. Choose transparent sections where viewing is essential. Mark cable exits clearly. Conduct a dry run with gloves, drapes, and the planned surgical position. Document any interference, because real procedures expose problems that product charts miss. Recheck after cleaning protocols change.
How to Choose a Sterile Cover for a C Arm or Microscope
Sterile covers for C arms and microscopes serve different operating-room needs. A C arm cover must accommodate movement around the patient, including rotation and height changes. Universal covers offer flexibility, but loose material can catch on cables or touch nonsterile surfaces. Custom-fit covers usually provide cleaner draping and fewer folds. They can cost more, but setup is often faster.
Microscope covers need careful attention to the eyepieces, objective lens, handles, and focus controls. A fitted cover with clear optical windows helps preserve image quality. Some designs include separate sections for the oculars and arm, reducing tension during repositioning. Transparent film should remain clear under bright surgical lights. Wrinkles matter here. Even a small crease can affect visibility or distract the surgeon.
Material choice also affects safety and handling. Strong polyethylene or multilayer film can resist tearing during equipment movement. A soft, low-lint surface may reduce particles near the sterile field. Check the cover’s dimensions, opening design, and compatibility with the equipment model. Follow the device instructions and facility protocols every time. Sterility depends on more than packaging. Staff technique, storage conditions, and careful opening all matter. A cover that looks suitable may still fail during setup, so teams should test fit and movement before relying on it in a procedure.
A sterile cover for a C-arm or microscope must protect the field without limiting movement. Material quality comes first. Medical-grade polyethylene, polypropylene, or breathable nonwoven laminates should resist tearing, fluid penetration, and lint release. Thin plastic may look clean, yet it can split around a sharp arm joint. That failure is easy to miss.
The World Health Organization’s 2022 global report estimates that 7 in 100 acute-care patients in high-income countries acquire at least one healthcare-associated infection. In low- and middle-income countries, the estimate rises to 15 in 100. A cover cannot remove every risk, but validated barrier performance matters. Check tested microbial resistance, seam strength, and packaging integrity. ISO 11607 supports validated sterile-barrier packaging, while EN 13795 addresses performance requirements for surgical drapes. A printed “sterile” claim is not enough.
Fit is equally important. Measure the equipment head, image intensifier, handles, cables, and working distance before ordering. The cover should stretch over corners without pulling against sterile gloves. It should also stay clear of vents and optical surfaces. A loose sleeve can brush the field; an oversized cover can drag on the floor. AAMI ST79 emphasizes controlled storage, package inspection, and event-related sterility practices. However, real operating rooms are imperfect. Staff may rush, labels may be overlooked, and one measurement may be wrong. Recheck fit during a simulated setup, not only on paper.
A sterile cover should protect the equipment without creating new handling problems. Check the packaging, seal, and material before opening it. A torn package is not a minor detail. It can compromise confidence during a demanding procedure. The cover should fit the C-arm or microscope closely, while leaving joints, cables, and controls accessible. Secure fasteners should prevent slipping, but they must not restrict movement or trap fluid near sensitive components.
Visibility needs practical testing, not attractive claims. Look for clear optical windows with low glare and minimal distortion. For microscopes, wrinkles near the objective lens can affect focus and image sharpness. For C-arms, the drape should not cover displays, positioning markers, or essential controls. Anti-fog performance also matters when room temperature changes. Not every clear film stays clear. A short trial under operating-room lighting can reveal reflections that packaging photos cannot show.
Ease of use is often underestimated. A well-designed cover should unfold in a predictable order and require limited adjustment. Staff should be able to apply it without stretching the material across sterile surfaces. Simple labels or fold indicators may reduce mistakes. Still, instructions can be overlooked when time is tight. That is worth examining. Teams should rehearse application, removal, and disposal according to local protocols. The best choice balances reliable protection, uninterrupted viewing, and calm handling when conditions become less than ideal.
How to Choose a Sterile Cover for a C Arm or Microscope
Confirm Packaging, Compatibility, and Safe Handling Requirements
A sterile cover is only dependable when its packaging remains intact. Check the seal, lot information, expiry date, and sterilization indicator before opening. Do not use a pack with punctures, moisture, loose edges, or unclear labeling. Small damage can compromise the sterile barrier. This check takes seconds.
Compatibility requires more than matching equipment names. Compare the cover’s dimensions with the C arm or microscope head, lens position, cables, handles, and control points. The cover should fit without stretching tightly across moving joints. Confirm that viewing areas remain clear and ventilation openings stay unobstructed. A poor fit may restrict movement or cause the material to slip during imaging.
Safe handling begins before the procedure. Open the package on a clean, prepared surface, keeping the cover away from nonsterile contact. Follow the facility’s approved instructions for donning, securing, and removing it. Use designated ties or fasteners, not improvised tape. Keep lenses free from fingerprints and avoid pulling across sharp edges. It is easy to rush here. That is where mistakes happen. Recheck the cover after positioning, especially when the equipment moves repeatedly. I would also question unclear instructions rather than assume a familiar shape guarantees compatibility.
Confirm packaging integrity, device compatibility, optical access, secure handling, and traceability before use.
The chart presents a practical review-priority score from 1 to 5, where 5 indicates a critical checkpoint. Packaging should be inspected for intact seals, damage, expiry information, and sterility status. Compatibility should be confirmed against the device dimensions, articulation range, viewing or imaging path, and the manufacturer’s instructions for use. During application, maintain aseptic technique, avoid contact with non-sterile surfaces, secure the cover without restricting movement, and document lot or traceability information when required.
Measure the image detector, intensifier, cables, and moving joints. The cover should allow rotation and height changes without pulling. Loose film can catch on cables. Test it with gloves and drapes.
It should cover the eyepieces, objective lens, handles, and focus controls. A clear optical window helps preserve visibility. The cover must not press against the lens. Small wrinkles can distract the surgeon.
Universal covers offer flexibility across equipment sizes. Fitted covers usually create fewer folds and faster setup. They may cost more. The cheaper option is not always easier.
Strong polyethylene or multilayer film can tolerate equipment movement. A soft, low-lint surface may reduce particles near the sterile field. Still, no material is perfect. Inspect it before use.
Check every opening before ordering. Keep handles, controls, vents, and cable exits accessible. Mark cable exits clearly during the dry run. A cover should protect equipment, not hide essential controls.
Practice with gloves, drapes, and the planned surgical position. Move the equipment through its full range. Look for folds, tension, glare, and contact with nonsterile surfaces. Real movement reveals problems. Product charts may miss them.
No. The cover adds a barrier but does not replace validated cleaning procedures. Staff must follow facility protocols for storage, opening, and application. A sealed package does not guarantee perfect handling.
Confirm the equipment model, dimensions, lens area, and procedure duration. Check for tearing after draping and repositioning. Document interference or poor visibility. Recheck the fit when cleaning protocols change. Some assumptions fail in practice.
Choosing the right sterile cover begins with understanding the procedure, the equipment’s shape, and the level of protection required. Knowing how to choose a sterile cover for a C-arm or microscope involves checking whether the cover is designed for the device’s moving parts, optical components, cables, and working distance. Compare available cover types according to size, opening design, flexibility, and intended use. A suitable cover should be made from reliable medical-grade material, fit securely without restricting movement, and meet applicable sterility and packaging requirements.
Protection, visibility, and ease of use are equally important. The cover should create an effective barrier against fluids and contamination while maintaining clear visualization through optical or imaging areas. It should be simple for staff to unfold, position, and secure without compromising the sterile field. Before use, confirm compatibility with the specific equipment, inspect the package for damage, and verify that the product remains sealed and sterile. Safe handling, proper disposal, and adherence to facility procedures help support consistent performance throughout the procedure.

NW Medical